Data Entry
Inspection Repository
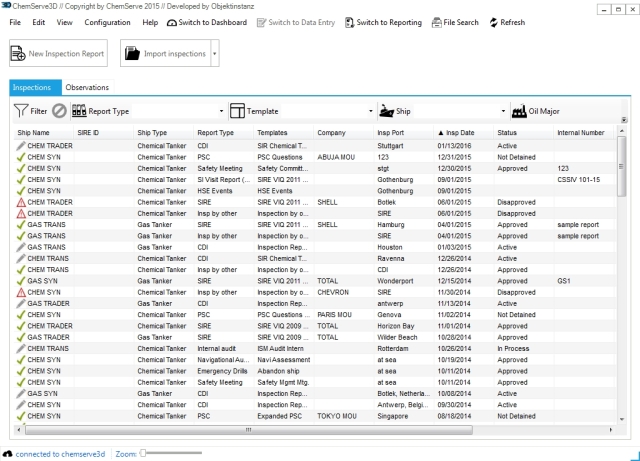
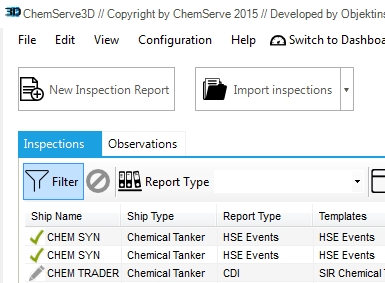
Data Entry Window is inspection repository of the 3D client.
It shows a list of all inspections records. This view can be filtered by Direct filters Report Type, Template, Oil Major or via the funnel icon.
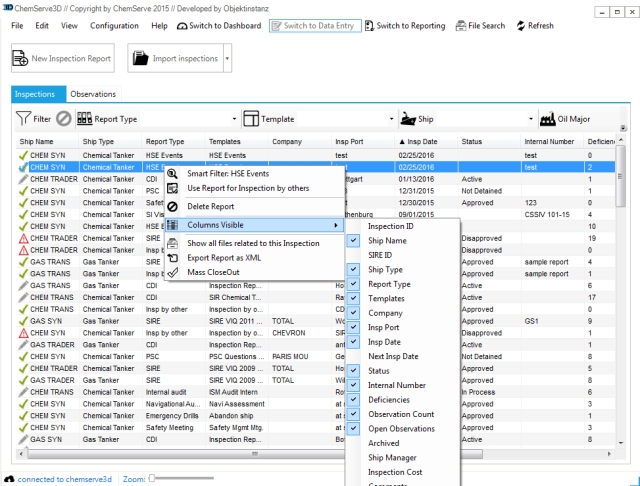
Customizing the inspection view columns
Sorting of the displayed records can be done by clicking into the column head and dragging the coumn to the desired position.
Clicking with the right mouse in one of the displayed records and select columns visible. Than select or deselect the desired columns . The settings will be saved.
Direct filters
The most simple and fastest method to set filters is selecting criteria via the boxes above the data table. In the inspection view these are the Report Type, Template, Ship Name and Company Name (oil major name)
Filter by right click on column head
Click with the right mouse on the column head of the field that you wan to filter. For example, if you want to see all inspections which have the status approved. click with the right mouse in the Status column head set the value to Approved.

Smart Filter
In case you want to limit the records to all inspections that occured in the inspection port Hamburg. Click with the right mouse into the Hamburg and select Smart Filter.
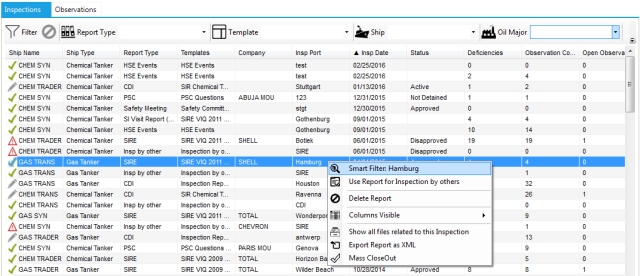
To remove the filter click de ban icon which becomes bold when filter is switched on.
Filter button in data entry
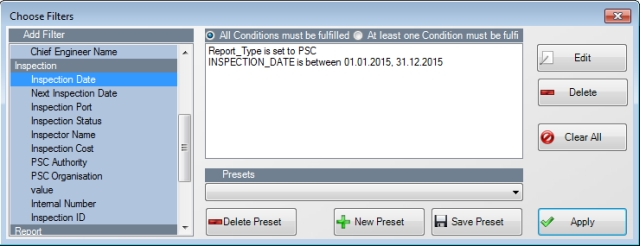
The most felixble method to set filter is the filter window that you can open by clicking on the filter icon. All filter settings that you have selected via the other methods are displayed in this filter window.
You can select other fields from the list on the left called Add Filter and modify your settings. Existing filters can be deleted by selecting the respective records and clicking on Delete or by clicking on Clear All. Existing settings can be modified by selecting the respective record and clicking on Edit. In the example below is a filter for PSC inspections in 2015.
Everytime a filter setting is active the warning sign next to the funnel icon becomes bold.
Eventually filter settings can be saved via New Preset and Save Preset.
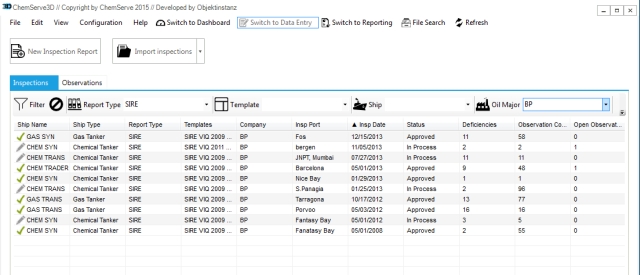
Save filter settings as Preset
Filter settings that you might want to use again in the future can be saved. To save the settings in the example above, click on New Preset and invent a meaningful name for this filter preset. Later the saved settings can be applied via the Direct Preset filter box.
Example Preset for all approved SIRE Inspections:

Delete an inspection record
In case an inspection record shall be deleted select the record with your cursor and
Right-click on your mouse and select Delete Report and confirm
or
Click the delete key on your keyboard and confirm.